Welcome!

By registering with us, you'll be able to discuss, share and message with other members of our community.

SignUp Now!

Jester's Sunburst Yellow Type R Bathurst R - '01

Fitting day arrived and my excitement was peaking! Off I popped to TPS for fitting.

As we all love to Ohlins, here is an exploded pre build photo.
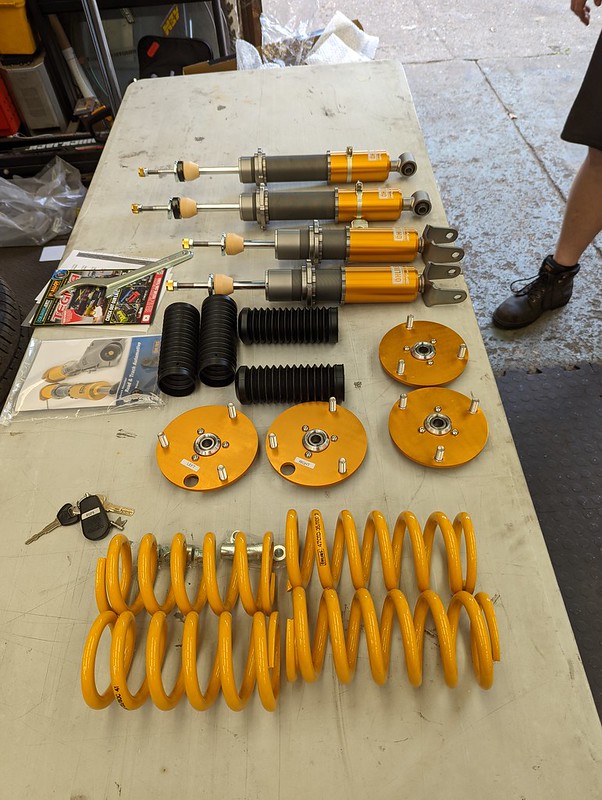
52082436788_8c901b64bd_c.jpg


These are what came off, the Showa adjustables, that are part of the Barthurst R "kit". These have been kept and boxed just in case. They weren't in the worst condition but all the rubbers were cracked and compromised and they definitely didn't feel right while on the car.
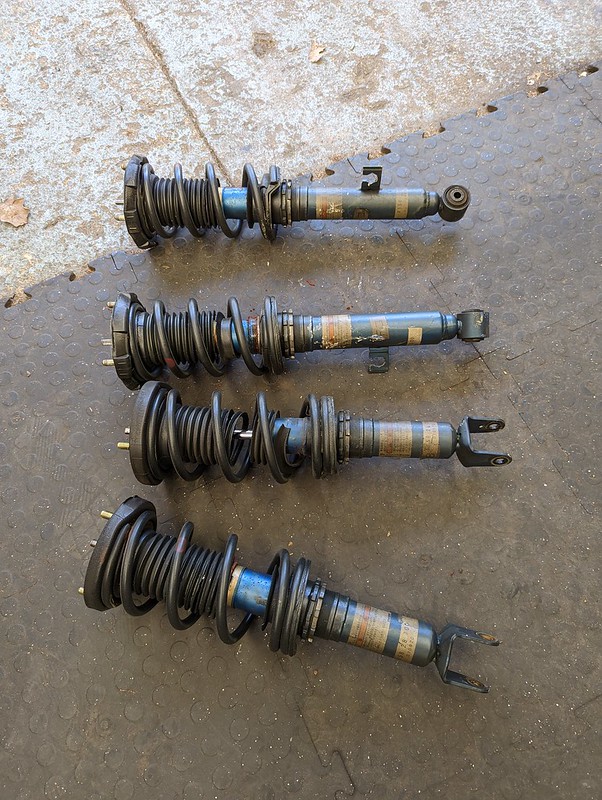
52082436563_ecdf986910_c.jpg


A cheeky little passenger side fitted shot.
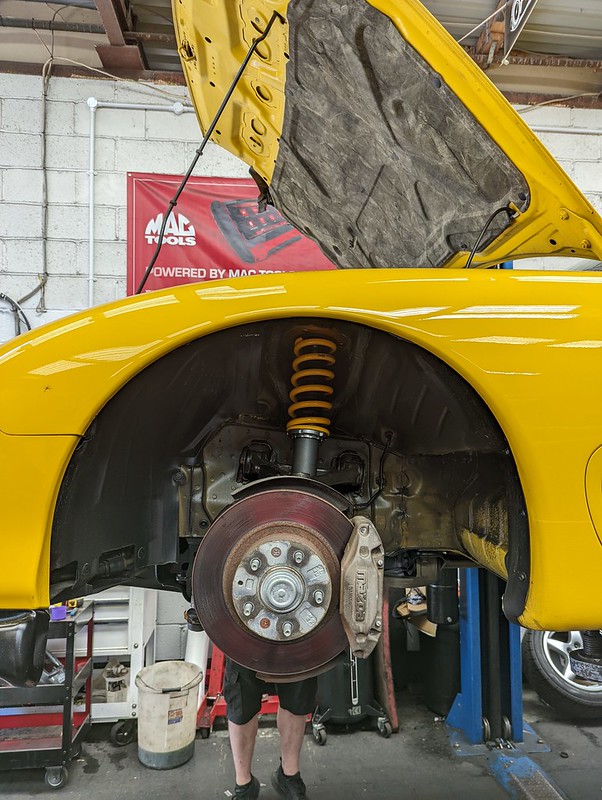
52082910370_b5287a4d3c_c.jpg


Then back on the ground, post test drive. Looking a little lower and definitely flatter.
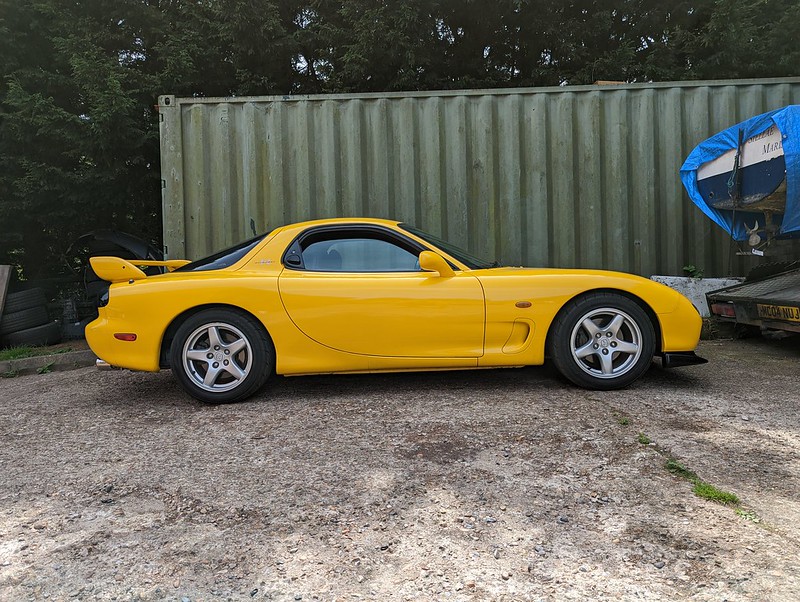
52082909470_dd66384711_c.jpg


My first impressions on the drive home, zipping along the M20 then down the A20, is that the car is completely transformed, where before there was excess roll and poor damping which prevented me from having any real confidence to push now there is a flatness and poise. Bumps don't crash through the car and are delt with much smoother. The front end feels much more pointed.

I am not going to lie, for a while I did wonder why the 7 was held in such high regard and had started to worry that I had made a huge mistake in meeting your hero.

I am so so so so happy to be proved wrong. Now I want to get her geo'd and corner weighted to dial it in, then get some good driving in before the winter.
 
Thanks, looking at your location I am just up the M20 from you in Ashford! We should get the FD's together,
Oh wow.. didnt expect you to be so close! Would definitely like to see your RX7 in the flesh!
Although i can imagine i will walk away very envious, seeing how immaculate yours is...

I'll PM you my number (y)
 
Today was a little trip down to IA Motorsport to get the RX7 aligned and get her a little more dialed in.

So without too much waffle here were the settings before:

Front

52125529267_2081835b69_c.jpg


Rear:

52125529502_594164aa5b_c.jpg


Looked like there was definitely some work to do on those settings!

52126794104_01775569cc_c.jpg


Both front and rears were set up with and without a passenger.

Rear no driver:

52125528687_a358a1241d_c.jpg


Rear with driver:

52126793554_002df6fe5d_c.jpg


Front no driver:

52126792954_923ea826bc_c.jpg


Front with driver:

52125528077_54a416d084_c.jpg


So a few changes were made, no bolts were siezed, which was a nice relief! There is a tiny amount of play in the steering rack which made getting it exactly spot on difficult, but its damn near close enough. Then the real proof was in the drive home and even though the weather has been really substandard today I could feel the difference in the front end massively. She feels much keener to turn in. The difference to when I picked her up is remarkable, Ohlins and geometry have been money well spent.

Oh and for the curious here are the corner weights of car with a full tank, minus one beefy driver.

52127048515_b6f2836c46_c.jpg


Here is my favourite photo from the day, great shape and great colour.

52126575083_78fd55283d_c.jpg
 
Awesome looking car! I need to get mine booked in with Ian, have been meaning to do this for over a year :rolleyes:
 
It was my first visit to him. Glad I did, really knowledgeable chap, good to find somewhere within 30 minutes of me!
 
Nice update, how are you finding the ride quality on the Ohlins? Which spring rate did you choose?
 
Ride quality is really good on the Ohlins to be honest. I am driving around on the mid damper setting (10 clicks from hard). Probably should do a test with them at fully soft.

Using the standard Ohlins 11/11 spring rates. The car handles it really well.
 
While having the 4 wheel alignment, I noticed that one of the brake lights was out. So I decided it was a great idea to replace all the brake lights and rear indicators at the same time.

52140003647_805e19f6ee_c.jpg


Really easy to get the rear lights out, 3 screws on each side and they slide out, as you look at the car from the rear the left light slides out to the left and the right light slides out to the right. Don't pull them towards you as you are likely to pop off the tabs.

Being super keen I managed to buy the wrong red OSRAM LED's BA15s, instead of BAY15d. Also when installing the rear indicators the car started to hyper flash.

This forum to the rescue who pointed out that I need to carry out a small mod in order to stop the hyper flash. This was removing CPU#2 from the drivers footwell, popping out the LED flasher circuit and removing a single resistor.

Old cars are so easy to pull apart, 2 bolts to remove the scuff plate, 2 interior pop screws to remove the plastic cover, 1 nut and 3 electrical connectors and we had...

52141509355_4771f80172_c.jpg


Noticed a bit of a crack in the plastic around where you screw the nut down to hold the CPU in place. So I filled that in with a bit of super glue as a stop gap to give it a bit of a strength.

52140003272_627a56670d_c.jpg


Then all you do is desolder resistor R1.

Put everything back together and hey presto you have normal indicatior flashes. That along with the correct OSRAM LED's for the normal/brake lights and we now have some upgraded bulbs. Well worth the trouble.

Later on in June.....

RX7 let me down a few days ago, well I say the RX7, the Clifford let me down. Lovely day so drove the car to the gym, when I came back out I couldn't unlock the car with the fob. Assuming it was to do with my positive batt terminal I got in manually and found it wasnt the battery.

The Clifford key fob battery had died! Now you cannot start the car without it, as it disconnects the immobiliser allowing you to start the car. So I had to rob someones battery, start the car, then give it to them back :rolleyes:

As a result of this I changed the batteries when I got home with spares I had lying around and ordered 2 sets to keep in the car along with a small 1/4" multi tool set for getting you out of small troubles.

Today I changed the positive battery terminal, rather handily a Nissan terminal is a direct fit P/N 24340-7F000. So for £6.80 it came across the world for me to fit. First impressions and it looks really solid and fit for purpose.

52165347850_b4f1b787e9_c.jpg


52164863721_e08110397a_c.jpg


This is the old one, trying to give you an impression of how crumpled and fatigued it was.

52165099524_4d42f78b1a_c.jpg


So fingers crossed this now sorts the issue of the terminal working its way loose while driving.
 
Found a solution to the RX7's floppy sunvisors. There are meant to be plastic barrels on the visor so it clips into place securely but being pretty old and Japanese these things have long since broken off.

Now there are replacements that are sold in the us for $12, but postage was $62 so I decided against that and decided to find an engineering workaround.

Cue the purchase of some 6mm ID, 2.5mm wall thickness silicone vacuum hose, 1m of it came to around £9.

52229278238_2574881f0b_c.jpg


So just measured the gap that it needed to fill, cut it to length and sliced it top to bottom to fit over the arm of the visor.

Before

52229274271_d470071449_c.jpg


After

52228269817_a0fa1013fe_c.jpg


Well blow me down, it worked a treat. Sunvisor clips in like it should and still swivvels nicely. The only thing I don't have to hand is some superglue to give a few dabs down the slice to properly secure it in place. But it doesn't feel like it will pop off.
 
I had an epic Clifford fail once, when the auto lock module.....rpm triggered... Triggered when I was standing out side it, because my idle was a bit high!

Lucky I was only a few miles from home, and my house key was in my pocket, but having a 3“ exhaust noisily rumbling away and wondering if it would be over heating the whole time! 😅
 
Hahaha that is quite unfortunate! I think I worry about the alarm than the usual rotary paranoia :ROFLMAO:
 
Found a solution to the RX7's floppy sunvisors. There are meant to be plastic barrels on the visor so it clips into place securely but being pretty old and Japanese these things have long since broken off.

Now there are replacements that are sold in the us for $12, but postage was $62 so I decided against that and decided to find an engineering workaround.

Cue the purchase of some 6mm ID, 2.5mm wall thickness silicone vacuum hose, 1m of it came to around £9.

View attachment 32755

So just measured the gap that it needed to fill, cut it to length and sliced it top to bottom to fit over the arm of the visor.

Before

View attachment 32756

After

View attachment 32757

Well blow me down, it worked a treat. Sunvisor clips in like it should and still swivvels nicely. The only thing I don't have to hand is some superglue to give a few dabs down the slice to properly secure it in place. But it doesn't feel like it will pop off.
Bargain solution haha
 
Just realised I haven't updated this thread for a bit!

Things have been slowing plodding along in the background. Recently when I took the good lady wife out for her birthday in the 7 I could hear what I guessed to be a rear pillowball starting to make some noise. So a complete refresh is on the cards.

Fiddy has already kindly supplied me with a SuperPro Kit and OEM trailing arms, I will be ordering some OEM pillow balls at some point during the winter to complete the set before probably getting the work done Spring of next year as by the end of October she will probably be SORN.

I am currently waiting on a few bits from Mazda including some OEM boot tailgate rubbers as mine are hard and quite brittle and I have a sneaking suspicion they are squeaking when I drive along. To make this slightly better I have stuck some felt to the tailgate above where the rubbers are to stop the noise.

Ohlins have been set to 15 clicks from hard so the ride is super compliant at the moment as was most enjoyable to and from GoJapan last weekend.

52380477711_6d4644069d_c.jpg


A good day was had and she got quite a lot of attention.

I also bought something for the shelf in my office.....

52343423384_7bc25cd883_c.jpg


Future plans still include,

17's and new tyres.
Intercooler
AutoExe induction
Apexi FC and remap on twins.
Steering wheel

Then enjoy. Still not feeling the need to go crazy.
 
A small update for today.

Passed its first MOT in my ownership today. With only covering about 1k miles this year. A pretty poor effort I must say, but having COVID put paid to one of my biggest plans this year, so with a few more mechanical jobs to do after the winter and a change in job, coming off shift work, which should allow me more time for car stuff. I will do better next year.

With some cylinder engined thing at the MOT centre. Ewww cylinders.

52437654028_2293fd0610_c.jpg


One of my scuttle blanks went AWOL at some point so a friend of a friend 3D printed some replacements as I really didn't fancy paying lots of money for OEM plastic versions. It didn't come out at all badly!

52436628812_3d0d5d93f0_c.jpg


Decided to pop the new boot rubbers on as they are a quick swap and I had some time after the MOT.
FD01-62-681C is the part number.

52437585595_52a95be61f_c.jpg


New next to crusty pretty solid 20+ year old rubber.

52437409254_0762b7101f_c.jpg


Just a photo for context of where they sit just behind the rear lights.

52437409164_48d9ba2a28_c.jpg


I did go to GoJapan where she got muchos attention. But for some reason I took 0 photos!

Still need to order pillowballs, and I am tempted to get the steering rack refurbished while she is away getting all the bushes done as at the alignment at IA Motorsport he said there was some play in the rack. So it could be wise to get that refreshed while away. Will speak to TPS about this next year.

RX7 will be heading to winter slumber in the next few weeks, SORN is incoming.
 
Small Christmas update.

The pillowballs are in country ordered from Nengun. Just waiting for Parcel Force to drop me the letter for the customs charges and I should have them in my possession.

Now as my 7 lives outside, I have been keeping on top of checking for leaks and making sure she remains ok. I have discovered a leak, which I originally thought was the the white nylon plugs just above the rear lights. So I ordered a pack of these to replace them anyway.

But after the huge rainfall we had in Kent this week on popping the boot loads of water came out of the trim by the boot struts, more so on the left hand side. Which instantly made me think of the rear hatch wiper. Popped the boot trim off gently and its really wet around there. So I have ordered a plug and I'll remove the rear wiper and seal it off hopefully over the new year before the motor gets wrecked.

Also noticed I am missing one of the parcel shelf clips. So I'll order a pair to replace one and have one spare.
 
Squeezed some time in yesterday, after work in the failing light, before the horrid Kent weather takes its toll over the next few days.

Boot trim coming off, wetness confirmed.

52595437826_5a5468f2da_c.jpg


52595861380_ed532a418d_c.jpg


52595698739_de348090c3_c.jpg


52594947882_73a804c7e0_c.jpg


The rear wiper arm came off far too easily. Spidey sense tells me that someone in Japan probably removed it previously before putting the car back to standard.

52595697989_68663c178a_c.jpg


52595956598_31ac313ca7_c.jpg


Boot trim came out very easily and no clips appear broken. They will stay in the garage for a bit to dry off and I intend on putting some trim tape/sound deadening on the plastics to make sure they won't rattle. Belt and braces approach and all that.

The wiper motor is one electrical connector and 3 bolts attaching it on the underside. With a nut threaded over the arm that sits on the topside. Remove all these and some rubber groomets and we have the following.

52595697879_1f0037e298_c.jpg


Plastic threaded plug with rubber washers installed with some loctite on the thread to make sure it doesn't come loose and we have the following.

52595860430_dd12e1e2af_c.jpg


I then conducted the super scientific. Watering can, dump a shed tonne of water over the plug and see if it leaks, which it didn't. So all fingers crossed if we get a dry spell over the next few days I won't have loads of water sat in the car.

Just an example of what I found on the grommets from the removed wiper assembly.

52595436641_7e65ee86a5_c.jpg


52595436561_cf50a0bc68_c.jpg


Whilst removing the boot trim I discovered I am a parcel shelf clip missing which also helps hold the trim in place. So I phoned up Mazda who said they are £3.60 each, perfect I'll take 2 so I have a spare. Part number if anyone is interested is FD01-68-301-02.
 
Squeezed some time in yesterday, after work in the failing light, before the horrid Kent weather takes its toll over the next few days.

Boot trim coming off, wetness confirmed.

View attachment 34330

View attachment 34331

View attachment 34332

View attachment 34333

The rear wiper arm came off far too easily. Spidey sense tells me that someone in Japan probably removed it previously before putting the car back to standard.

View attachment 34334

View attachment 34335

Boot trim came out very easily and no clips appear broken. They will stay in the garage for a bit to dry off and I intend on putting some trim tape/sound deadening on the plastics to make sure they won't rattle. Belt and braces approach and all that.

The wiper motor is one electrical connector and 3 bolts attaching it on the underside. With a nut threaded over the arm that sits on the topside. Remove all these and some rubber groomets and we have the following.

View attachment 34336

Plastic threaded plug with rubber washers installed with some loctite on the thread to make sure it doesn't come loose and we have the following.

View attachment 34337

I then conducted the super scientific. Watering can, dump a shed tonne of water over the plug and see if it leaks, which it didn't. So all fingers crossed if we get a dry spell over the next few days I won't have loads of water sat in the car.

Just an example of what I found on the grommets from the removed wiper assembly.

View attachment 34338

View attachment 34339

Whilst removing the boot trim I discovered I am a parcel shelf clip missing which also helps hold the trim in place. So I phoned up Mazda who said they are £3.60 each, perfect I'll take 2 so I have a spare. Part number if anyone is interested is FD01-68-301-02.
I have yet to do the same with mine, so it’s quite good to see you’ve already removed yours, think I will leave mine off though as can’t really see out the back it very well anyway! Looks like it’s been really dry and nearly used
 
Back
Top